Table of contents
Motivation
Despite using a FTTH internet connection since 2014, aside from the one fiber uplink, I had always used network gear with 1 Gbit/s links over regular old rj45 cat5(e) cables.
I liked the simplicity and uniformity of that setup, but decided it’s time to add at least one fiber connection, to get rid of a temporary ethernet cable that connected my kitchen with the rest of my network that is largely in the living room and office.
The temporary ethernet cable was an experiment to verify that running a server or two in my kitchen actually works (it does!). I used a flat ethernet cable, which is great for test setups like that, as you can often tape it onto the walls and still close the doors.
So, we will replace one ethernet cable with one fiber cable and converters at each end:
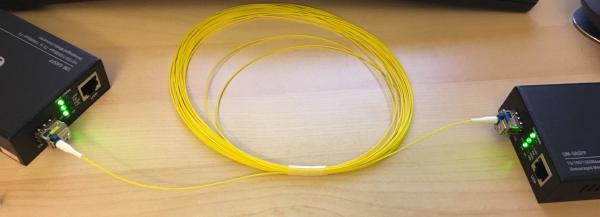
Why is it good to switch from copper ethernet cables to fiber in this case? Fiber cables are smaller and hence easier to fit into existing cable ducts. While regular ethernet cable is way too thick to fit into any of the existing ducts in my flat, I was hoping that fiber might fit!
When I actually received the cables, I was surprised how much thinner fiber cables actually can be: there are 0.9mm cables, which are so thin, they can be hidden in plain sight! I had only ever seen 2mm fiber cables before, and the 0.9mm cables are incredibly light, flexible and thin! Even pasta is typically thicker:
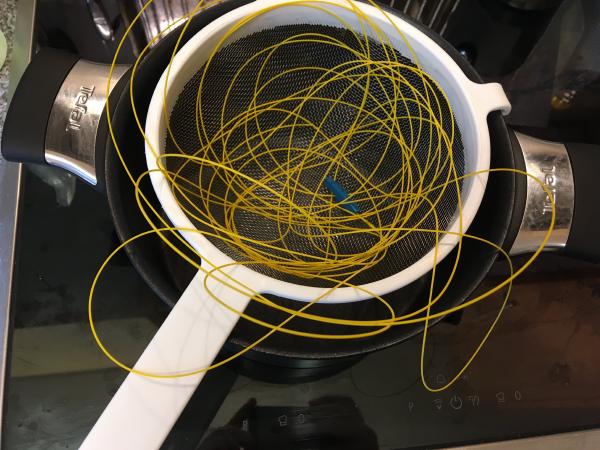
Preparing a delicious pot of glass noodles ;)
The cable shown above comes from the fiber store FS.COM, which different people have praised on multiple occasions, so naturally I was curious to give them a shot myself.
Also, for the longest time, it was my understanding that fiber connectors can only be put onto fiber cables using expensive (≫2000 CHF) machines. A while ago I heard about field assembly connectors so I wanted to verify that those indeed work.
Aside from practical reasons, playing around with fiber networking also makes for a good hobby during a pandemic :)
Hardware Selection
I ordered all my fiber equipment at FS.COM: everything they have is very affordable, and products in stock at their German warehouse arrive in Switzerland (and presumably other European countries) within the same week.
If you are in the luxurious position to have enough physical space and agility to pull through an entire fiber cable, without having to remove any connectors, you can make a new network connection with just a few parts:
| amt | price | total | article | note |
|---|---|---|---|---|
| 2x | 36 CHF | 72 CHF | #101473 | 1 Gbit/s media converter RJ45/SFP |
| 1x | 8.5 CHF | 8.5 CHF | #39135 | 1 Gbit/s BiDi SFP 1310nm-TX/1550nm-RX |
| 1x | 11 CHF | 11 CHF | #39138 | 1 Gbit/s BiDi SFP 1550nm-TX/1310nm-RX |
| 1x | 2.3 CHF | 2.3 CHF | #12285 | fiber cable, 0.9mm LC UPC/LC UPC simplex |
I recommend buying an extra fiber cable or two so that you can accidentally damage a cable and still have enough spares.
Total cost thus far: just under 100 CHF. If you have existing switches with a free SFP slot, you can use those instead of the media converters and save most of the cost.
If you need to temporarily remove one or both of the fiber cable connector(s), you also need field assembly connectors and a few tools in addition:
| amt | price | total | article | note |
|---|---|---|---|---|
| 2x | 4 CHF | 8 CHF | #35165 | LC/UPC 0.9mm pre-polished field assembly connector |
| 1x | 110 CHF | 110 CHF | #14341 | High Precision Fibre Optic Cleaver FS-08C |
| 1x | 26 CHF | 26 CHF | #14346 | Fibre Optic Kevlar Cutter |
| 1x | 14 CHF | 14 CHF | #72812 | Fibre Optical Stripper |
I recommend buying twice the number of field assembly connectors, for practicing.
Personally, I screwed up two connectors before figuring out how the process goes.
Total cost: about 160 CHF for the field assembly equipment, so 260 CHF in total.
To boost your confidence in the resulting fiber, the following items are nice to have, but you can get by without, if you’re on a budget.
| price | article | note |
|---|---|---|
| 18 CHF | #35388 | FVFL-204 Visual Fault Locator |
| 9.40 CHF | #82730 | 2.5mm to 1.25mm adapter for Visual Fault Locator |
| 4.10 CHF | #14010 | 1.25mm fiber clean swabs (100pcs) |
With the visual fault locator, you can shine a light through your fiber. You can verify correct connector assembly by looking at how the light comes out of the connector.
The fiber cleaning swabs are good to have in general, but for the field assembly connector, you need to use alcohol-soaked wipes anyway (which FS.COM does not stock).
The total cost for everything is just under 300 CHF.
Hardware Selection Process
The large selection at FS.COM can be overwhelming to navigate at first. My selection process went something like this:
My first constraint is using bi-directional (BiDi) fiber optics modules so that I only need to lay a single fiber cable, as opposed to two fiber cables.
The second constraint is to use field assembly connectors.
If possible, I wanted to use bend-insensitive fiber so that I wouldn’t need to pay so much attention to the bend radius and have more flexibility in where and how I can lay fiber.
With these constraints, there aren’t too many products left to combine. An obvious and good choice are 0.9mm fiber cable using LC/UPC connectors.
FS.COM details
As of 2020-08-05, FS.COM states they have 5 warehouses in 4 locations:
- Delaware (US)
- Munich (Germany)
- Melbourne (Australia)
- Shenzhen (China)
They recently built another, bigger (7 km²) warehouse in Shenzhen, and now produce inventory for the whole year.
By 2019, FS.COM had over 300,000 registered corporate customers, reaching nearly 200 million USD yearly sales.
Delivery times
As mentioned before, delivery times are quick when the products are in stock at FS.COM’s German warehouse.
In my case, I put in my order on 2020-Jun-26.
The items that shipped from the German warehouse arrived on 2020-Jul-01.
Some items had to be manufactured and/or shipped from Asia. Those items arrived after 3 more weeks, on 2020-Jul-24.
Unfortunately, FS.COM doesn’t stock any 0.9mm fiber cables in their German warehouse right now, so be prepared for a few weeks of waiting time.
Laying The Fiber
Use a cable puller to pull the fiber through existing cable ducts where possible.
-
In general, buy the thinnest one you can find. I have this 4mm diameter cable puller, but a 3mm or even 2mm one would work in more situations.
-
I found it worthwhile to buy a brand one. It is distinctly better to handle (less stiff, i.e. more flexible) than the cheap one I got, and thinner, too, which is always good.
In my experience, it generally did not work well to push the fiber into an existing duct or alongside an existing cable. I really needed a cable puller.
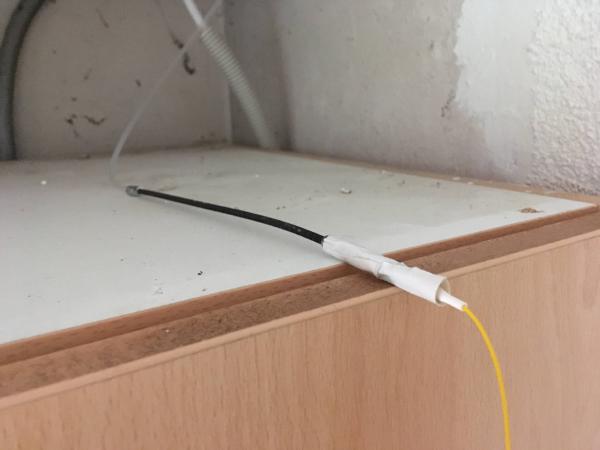
If you’re lucky and have enough space in your duct(s), you can leave the existing connectors on the fiber. I have successfully just used a piece of tape to fix the fiber connector on the cable puller, pushing down the nose temporarily:
Where there are no existing ducts, you may need to lay the fiber on top of the wall. Obviously, this is tricky as soon as you need to make a connection going through a wall: whereas copper ethernet cables can be bent and squeezed into door frames, you quickly risk breaking fiber cables.
Luckily, the fiber is very light, so it’s very easy to fix to the wall with a piece of tape:
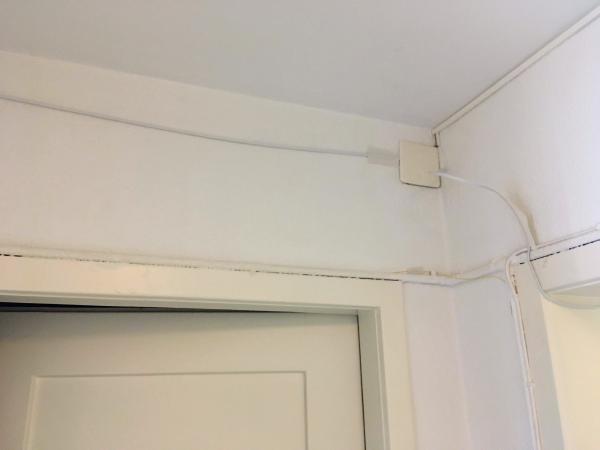
You can see the upstream internet fiber in the top right corner, which is rather thick in comparison to my 0.9mm yellow fiber that’s barely visible in the middle of the picture.
Note how the fiber entirely disappears behind the existing duct atop the door!
Above, you can see the flat ethernet cable I have been using as a temporary experiment.
Where there is an existing cable that you can temporarily remove, it might be possible to remove it, put the fiber in, and put the old cable back in, too. This is possible because the 0.9mm fiber cable is so thin!
I’m using this technique to cross another wall where the existing cable duct is too full, but there is a cable that can be removed and put back after pulling the fiber through:
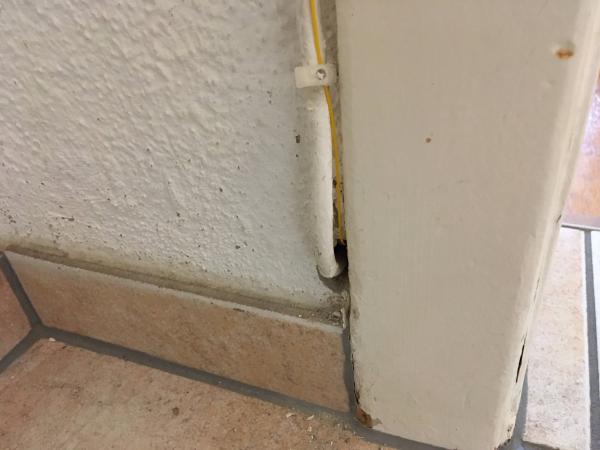
…and on the other side of the wall:
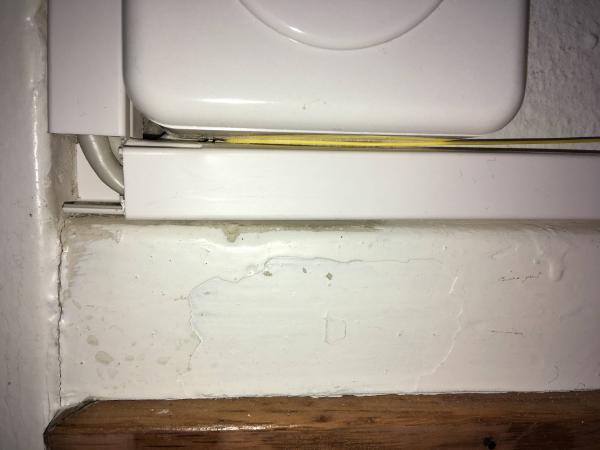
Note how the fiber is thin enough to fit between the socket and duct!
Note: despite measuring how long a fiber cable I would need, my cable turned out too short! While the cable was just as long as I had measured, with distances exceeding 10m, it is a good idea to add a few meters spare on each side of the connection.
Field assembly connectors
To give you an overview, these are the required steps at a high level:
- Cut the fiber with the Fibre Optic Kevlar Cutter
- Strip the fiber with the Fibre Optical Stripper
- Put the field assembly jacket onto the fiber
- Cut the stripped fiber cleanly with the High Precision Fibre Optic Cleaver FS-08C
- Put the field assembly connector onto the fiber
I thought the following resources were useful:
- Pictograms: PDF: FS.COM LC UPC field assembley connectors quick start guide
- Pictures: Installation Procedure on FS.COM
- Video: YouTube: Terminate Fiber in 5 Minutes: this video shows a different product, but I found it helpful to see any field assembly connector on video, and this is one of the better videos I could find.
Beware: the little paper booklet that comes with the field assembly connector contains measurements which are not to scale. I have suggested to FS.COM that they fix this, but until then, you’ll need to use e.g. a tape measure.
For establishing an intuition of their different sizes, here are the different connectors:
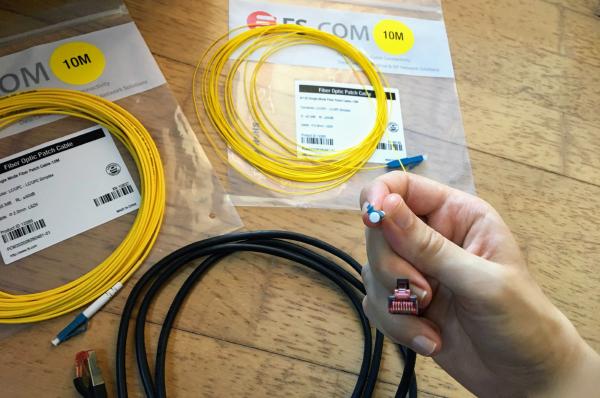
From left to right:
- 2.0mm fiber cable
- cat6 ethernet cable
- 0.9mm fiber cable (LC/UPC factory)
- 0.9mm fiber cable (LC/UPC field assembly connector)
The 0.9mm fiber cables come with smaller connectors than the 2.0mm fiber cables, and that alone might be a reason to prefer them in some situations.
The field assembly connectors are pretty bulky in comparison, but since you can attach them yourself after pulling only the cable through the walls and/or ducts, you usually don’t care too much about their size.
Conclusion
Modern fiber cables available at FS.COM are:
- thinner than I expected
- more robust than I expected
- cheaper than I expected
- survive tighter bend radiuses than I expected
Replacing this particular connection with a fiber connection was a smooth process overall, and I would recommend it in other situations as well.
I would claim that it is totally feasible for anyone with an hour of patience to learn how to put a field assembly connector onto a fiber cable.
If labor cost is expensive in your country or you just like doing things yourself, I can definitely recommend this approach. In case you mess the connector up and don’t want to fix it yourself, you can always call an electrician!
Also check out the next blog post, Home network 10 Gbit/s upgrade, where I upgrade the 1G link to a 10G link!
I run a blog since 2005, spreading knowledge and experience for over 20 years! :)
If you want to support my work, you can buy me a coffee.
Thank you for your support! ❤️