
Back in 2013, I published a replacement controller for the Kinesis Advantage ergonomic keyboard. In the community, it is often referred to simply as the “stapelberg”, and became quite popular.
Many people like to use the feature-rich QMK firmware, which supports my replacement controller out of the box.

On eBay, you can frequently find complete stapelberg kits or even already-modified Kinesis keyboards including the stapelberg board for sale.
In 2017, Kinesis released the Kinesis Advantage 2, which uses a different connector (an FPC connector) for connecting the two thumb pad PCBs to the controller PCB, instead of the soldered cable the older Kinesis Advantage used. Aside from the change in connector and cable type, the newer keyboard uses the same pinout as the old one.
I wanted to at least update my project to support the Kinesis Advantage 2. While doing so, I decided to also make a bunch of improvements to make the project more approachable and usable for beginners. Among many other improvements, the project switched from Eagle to KiCad, which is FOSS and means no more costly license fees!
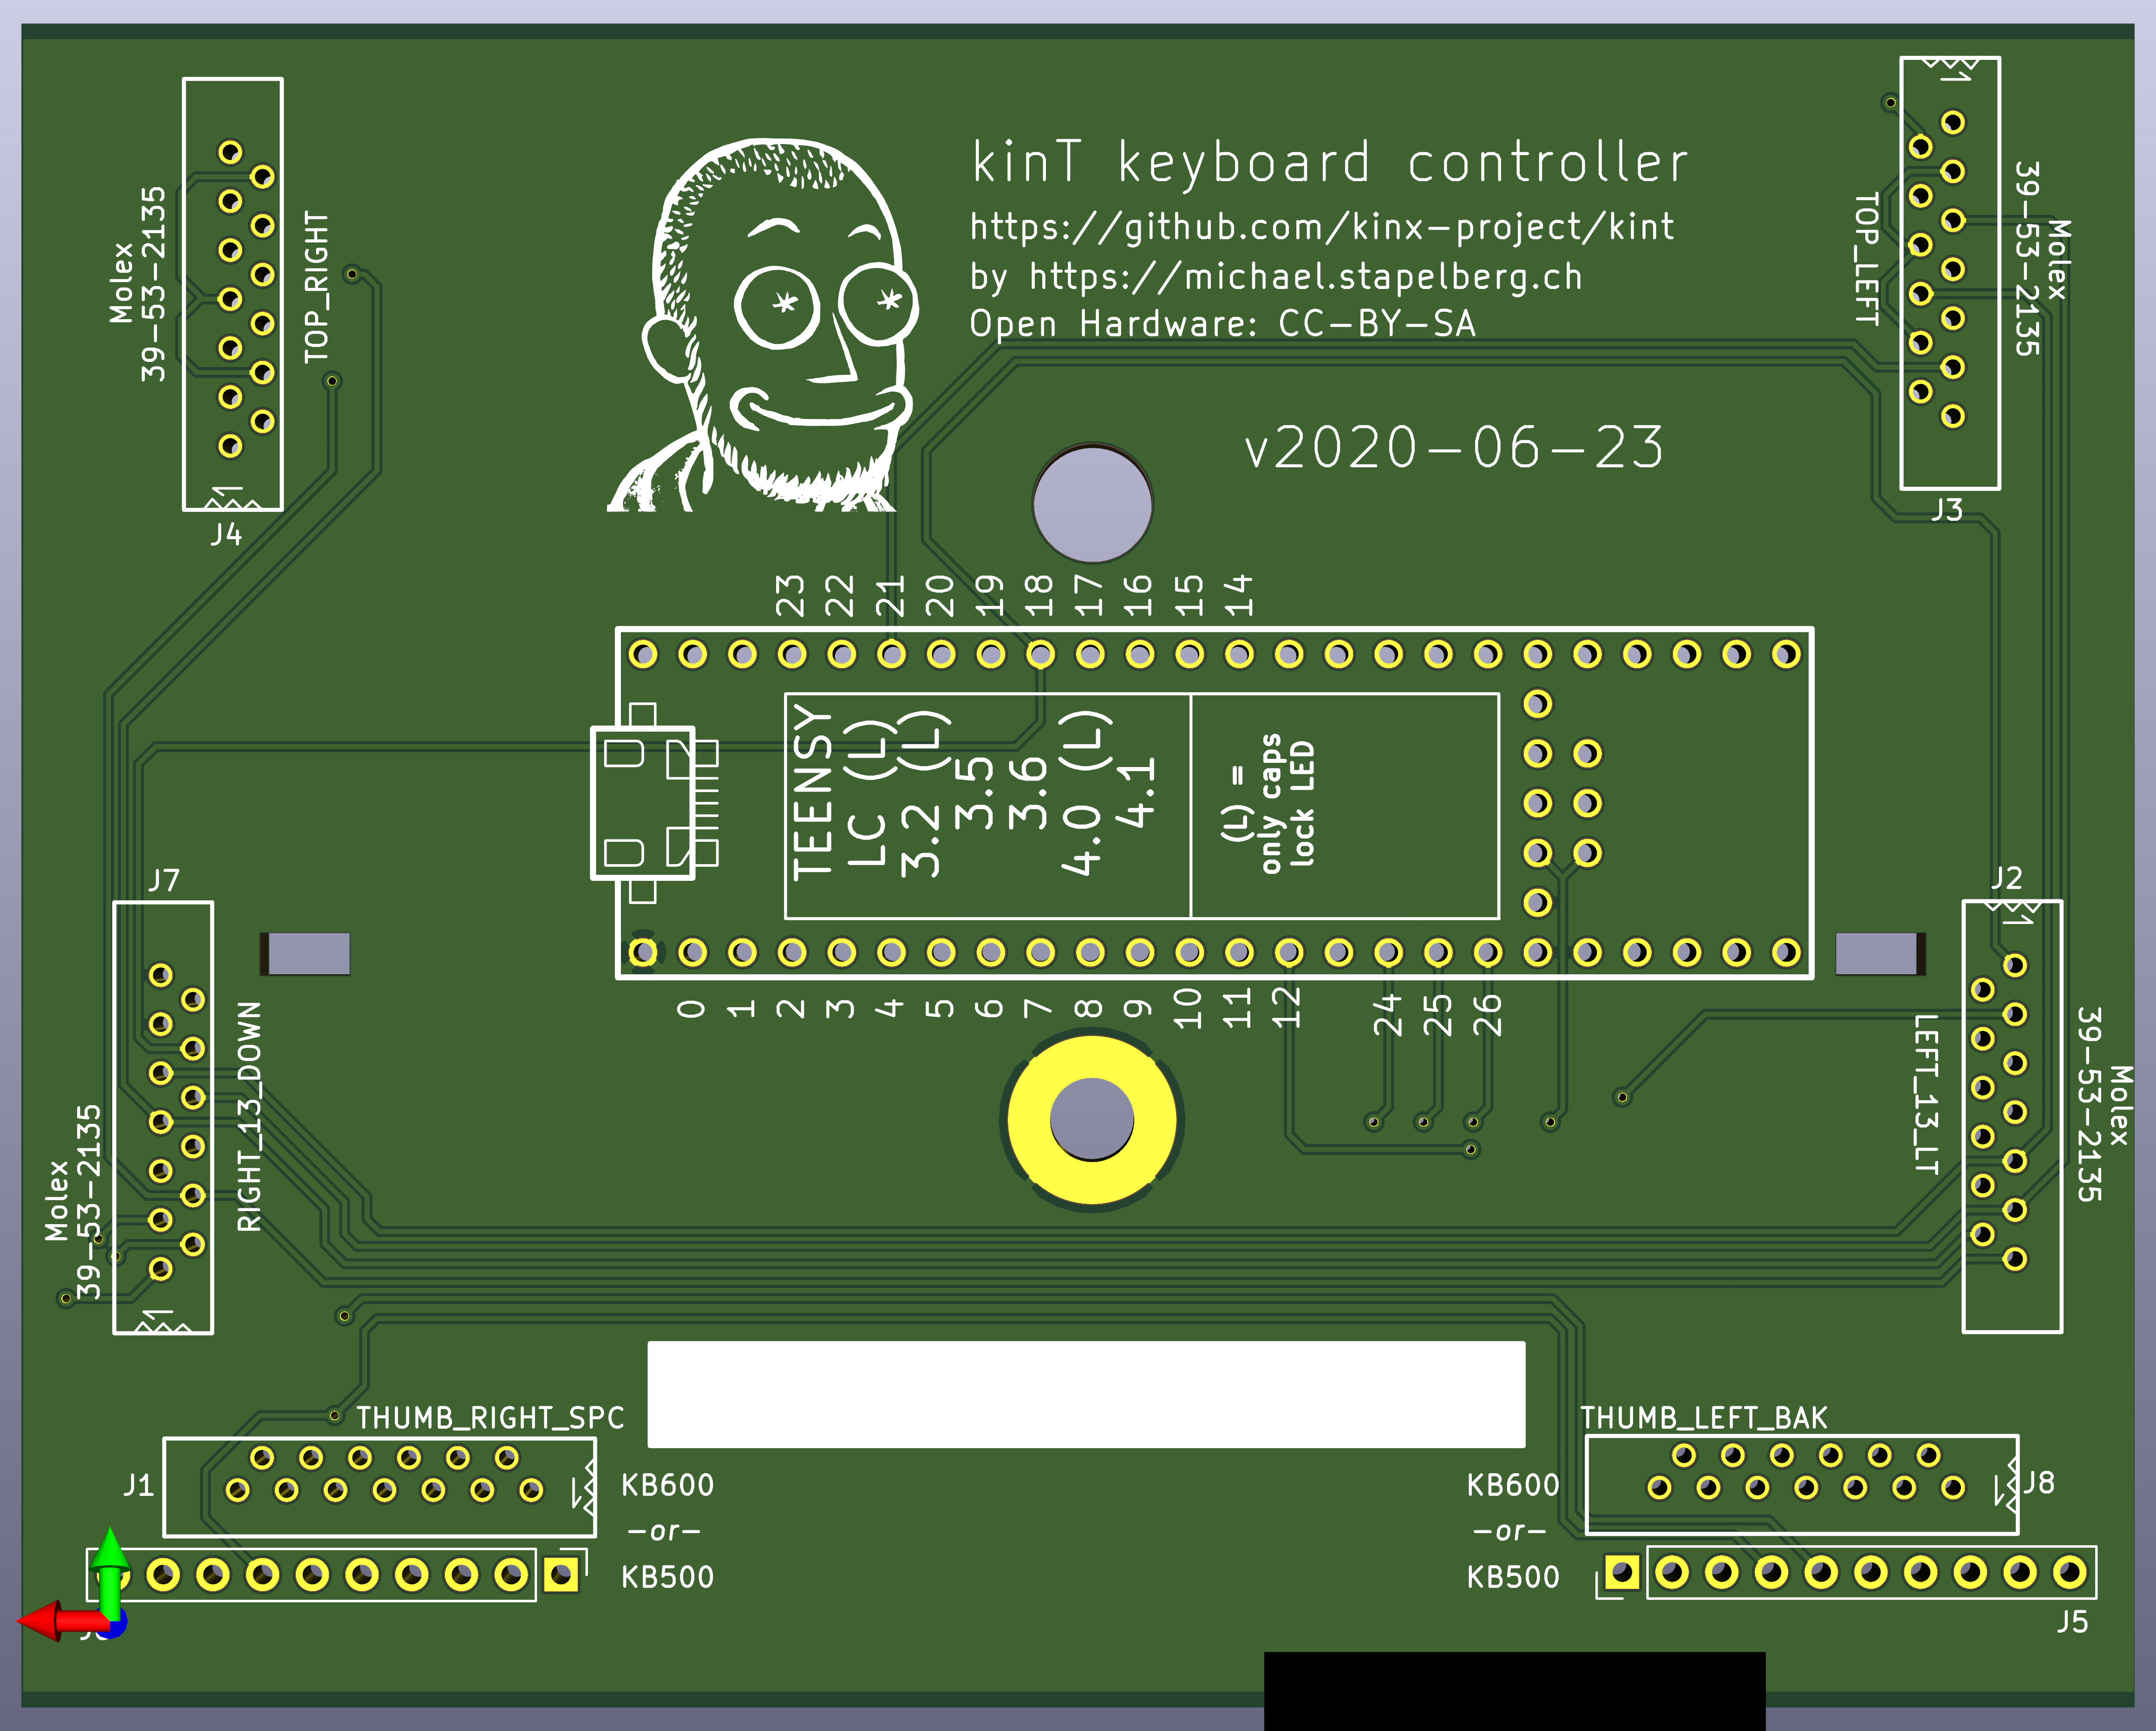
kinT (T for Teensy!)
I am hereby announcing the kinT kinesis keyboard controller: a replacement keyboard controller for your Kinesis Advantage or Advantage 2 ergonomic keyboards.

The Teensy footprint looks a bit odd, but it’s a combined footprint so that you can use the same board with many different Teensy microcontrollers, giving you full flexibility regarding cost and features. See “Compatibility: which Teensy to use?” for more details.
I originally replaced the controller of my Kinesis Advantage to work around a bug, but these days I do most of it just because I enjoy tinkering with keyboards.
You might consider to replace your keyboard controller for example…
- to build or modify your own keyboard
- to work around bugs in the standard controller
- because you prefer to run open source software such as the QMK firmware, even on your keyboard
Building your own kinT keyboard controller
-
Follow “Buying the board and components (Bill of materials)”. When ordering from OSH Park (board) and Digi-Key (components), you’ll get the minimum quantity of 3 boards for 72 USD (24 USD per board), and one set of components for 49 USD.
- If you have any special requirements regarding which Teensy microcontroller to use, this is the step where you would replace the Teensy 3.6 with your choice.
-
Wait for the components to arrive. When ordering from big shops like Digi-Key or Mouser, this typically takes 2 days to many places in the world.
-
Wait for the boards to arrive. This takes 6 days in the best case when ordering from OSH Park with their Super Swift Service option. In general, the longer you are willing to wait, the cheaper it is going to get.
-
Follow the soldering guide. This will take about an hour.
Improvements over the older replacement board
In case you’re familiar with the older replacement board and are wondering what changed, here is a complete list:
-
The kinT supports both, the older Kinesis Advantage (KB500) and the newer Kinesis Advantage 2 (KB600) keyboards. They differ in how the thumb pads are connected. See the soldering instructions below.
-
The kinT is made for the newer Teensy 3.x and 4.x series, which will remain widely available for years to come, whereas the future of the Teensy++ 2.0 is not as certain.
-
The kinT is a smaller PCB (4.25 x 3.39 inches, or 108.0 x 86.1 mm), which makes it:
-
more compact: can be inserted/removed without having to unscrew a key well.
-
cheaper: 72 USD for 3 boards at oshpark, instead of 81 USD.
-
-
The kinT silkscreen (front, back) and schematic are much much clearer, making assembly a breeze.
-
The kinT is a good starting point for your own project:
-
kinT was designed in the open source KiCad program, meaning you do not need any license subscriptions.
-
The clear silkscreen and schematic make development and debugging easier.
-
-
On the kinT, the Teensy no longer has to be soldered onto the board upside down.
-
On the kinT, the FPC connectors have been moved for less strain on the cables.
-
The kinT makes possible lower-cost builds: if you don’t need the scroll lock, num lock and keypad LEDs, you can use a Teensy LC for merely 11 USD.
Conclusion
I’m very excited to release this new keyboard controller, and I can’t wait to see all the custom builds and modifications!
By the way, there is also a (4-hour!) stream recording in case you are interested in some more history and context, and want to see me solder a kinT controller live on stream!
I run a blog since 2005, spreading knowledge and experience for almost 20 years! :)
If you want to support my work, you can buy me a coffee.
Thank you for your support! ❤️